Repairing a toilet can be easier than most folks expect. If it’s a toilet that is running all the time or a toilet that is leaking, there are a few easy things to check first before calling in a plumber to take care of the issue. Taking a few steps to see if you can repair your toilet can save money on repair costs as well as your water bill. I will cover standard two-piece toilets for this guide, but most of this information will easily apply to standard one-piece toilets as well. If you have a wall-hung toilet, a toilet with a flushometer (such as a Sloan Valve), or a smart toilet, there will be different steps to diagnose and repair your toilet. I will go over some the easy ways to diagnose and fix some of the common problems I’ve come across with toilets!
If your toilet is running, it may give you some obvious clues. You may hear the fill valve hiss and water filling the tank. If you have a few different bathrooms in your home sometimes you won’t hear the toilet running at all. Maybe your water bill just increased and you and your family haven’t changed your personal water use habits. Either way, one trick to find the toilet that is running is to use food coloring and put a few drops in the tank and let it sit. Once the water in the tank has changed colors let it sit for 20 to 30 minutes.
- If the water in the bowl changes color, this usually means you will need to replace the toilets flapper.
- If there is a small puddle under the tank that is the same color as your food coloring you used, the tank to bowl bolts or tank to bowl gaskets may need to be replaced.
Some toilets use a generic 2” or 3” flapper. Some brands like Toto and Kohler use specific types of flappers for specific models they make that only work with that specific toilet. These toilets might have a specific flush valve or action from the trip lever that can only work with the required flapper. If you need to find out what toilet you have, usually the manufacturer will stamp the model number inside the toilet tank or right on the inside of the tank lid.
Once you have the right flapper for your toilet, lets replace the flapper:
- Turn the water off to the toilet and flush the toilet to drain the tank.
- Remove the flapper from the seat on the flush valve and unhook the chain from the flush lever.
- Install the new flapper on the seat of the flush valve and set the chain length for the trip lever.
- Turn the water back on and let the tank fill and flush the toilet to make sure you have a proper flush.
It’s normally that easy! It's always important to make sure that any extra chain from the flapper is either removed or secured to the trip lever so that it doesn’t accidentally go in between the flapper and the flush valve causing the flapper not to seat properly. Also, I always like to double check the angle or straight stop that I used to turn the water off as well. If it’s a multi-turn stop sometimes the packing nut needs to be tightened to prevent it from leaking.
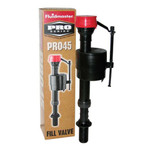
Usually when replacing a flapper, I will replace the fill valve at the same time just to be on the safe side. Fill valves can go bad on their own. This usually happens in one of two ways. The first is that the toilet will take a very long time to fill after you flush it. The second is a little less obvious and not as common, but it is when the fill valve is siphoning water from the tank. This usually only happens on older fill valves and ballcocks when the refill tube is not in the overflow tube of the flush valve. New fill valves have anti-siphon safety measures built into the valve. One-piece toilets, flapper-less toilets, and specialty toilets will use specific fill valves that are made for those specific models. Most toilets can use a generic fill valve, but you should be careful when installing a universal fill valve to ensure compatibility. Let’s go step by step in replacing them.

- Turn the water off to the toilet and flush the toilet to drain the tank.
- Disconnect the supply line from the fill valve.
- I like to put a small bucket under the fill valve and then loosen the nut for the that is securing the fill valve, once the nut is off pull the fill valve out of the tank. The remaining water in the tank will drain into our small bucket
- Put the gasket on the shank of the new fill valve, put it in the tank and tighten the nut under the tank.
- Adjust the height of the fill valve so the top of the fill valve is above the overflow tube for the toilet usually by 1” and adjust the height of the float to determine how much water goes in the tank.
- Reconnect the supply line from the toilet and turn the water back on and let the tank fill. Check for leaks and flush the toilet to make sure you have a proper flush.
- If you need to adjust the water level or raise the height of the fill valve, turn the water off and make adjustments.
If you found a leak with the tank to bowl bolts, or the tank to bowl gasket(found in this kit), this is a little bit more of a difficult project. If you are not comfortable taking apart the entire toilet tank, I would recommend turning the water off to the toilet and calling a professional. If you are feeling particularly handy, let’s turn the water off and walk through the repair.
- Turn the water off to the toilet and flush the toilet to drain the tank.
- Remove the supply line from the fill valve
- With a flat-head screw driver or a deep well socket, secure the tank bolt from inside the tank while at the same time use a wrench to loosen the nut that secures the tank bolt to the bowl repeat this until you have removed the tank from the bowl.
- Now that the tank is off, I like to set it on a towel on its back. This catches any additional water in the tank helping cut down on the mess and not scratching any surfaces with the rough side of the tank. Ideally you could do this at a work bench, but if space is limited, the towel can go on closed toilet seat and that can act as an impromptu work bench.
- Inset the new tank to bowl gaskets and the tank bowl bolts.
- If you are replacing a flush valve or just the tank to bowl gasket this is a great time to remove and replace either of those parts. The gasket slips on the part of the flush valve that stick out from the bottom of the bowl.
- If you’re replacing the entire flush valve, you will remove the gasket and loosen the large nut that secures the flush valve to the bottom of the tank. Insert the new flush valve and position it properly in the toilet so the flapper will align with trip lever.
- Once everything is snug, you have all the gaskets in their right place and all the nuts firmly tightened, put the tank back on the toilet
- With a flat head screwdriver or a deep well socket, secure the tank bolt from inside the tank while at the same time use a wrench to tighten the nut that secures the tank bolt to the bowl repeat this until you have tightened all of the tank to bowl bolts.
- Reconnect the supply line from the toilet and turn the water back on and let the tank fill. Check for leaks and flush the toilet to make sure you have a proper flush.
The tank should be tight enough not to move around if you were sitting on the toilet, but not so tight that it cracks the toilet bowl or the tank itself. Personally, anytime I am removing the tank of a toilet I will go out of my way to replace everything I can in the toilet. It doesn’t make sense to do all that work and need to back a little while later and only to replace something that would have added five minutes to the original job.