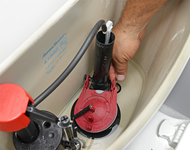
When your toilet isn’t flushing properly, the culprit is often a worn-out toilet flapper. This small but essential part controls the flow of water from the tank into the bowl, and if it’s malfunctioning, it can lead to leaks or inefficient flushing. We’ll help you navigate the process of selecting the right flapper for your toilet. From understanding different types and materials to knowing how to properly install and maintain your new flapper, we’ll provide you with expert advice to ensure your toilet runs smoothly and efficiently for years to come.
After speaking with numerous customers, it became evident that our blog post "DIY Project: Toilet Repair," while a valuable resource, may be too cluttered. To better assist those looking to repair their toilets, I've decided to break the information into three distinct blog posts, each focusing on a key component of toilet repair. Each post will provide detailed, step-by-step instructions aimed at replacing specific parts, making it easier for DIY enthusiasts to tackle their repairs. I'll be addressing each segment: the fill valve, the flapper, and the trip lever.
How to Replace a Flapper
Replacing a flapper in a toilet is a straightforward DIY repair that can be accomplished with just a few basic tools. The flapper is responsible for creating a seal that holds water in the tank until you flush. A bad flapper can cause various issues, such as a constantly running toilet, slow flushing, or even leaks. If your toilet is showing any of these signs, it’s likely time for a flapper replacement. Doing so can restore your toilet's functionality and help conserve water. Follow these simple steps:
1. Turn off the water supply to the toilet and flush to drain the tank.
2. Disconnect the chain attached to the trip lever inside the tank.
3. Remove the old flapper by detaching it from the flush valve. Most flappers either hook on or snap into place.
4. Install the new flapper by attaching it to the flush valve and reconnecting the chain to the trip lever.
5. Turn the water back on, let the tank fill, and test the flush. Make sure the chain is the correct length and not too tight or loose, as this can impact the flapper’s ability to seal properly.
When choosing the best toilet flapper, consider factors like the material, size, and compatibility with your toilet model. Universal toilet flappers are a great option as they fit most standard toilets. For more detailed guidance, refer to our toilet flapper replacement guide.
Troubleshooting Common Flapper Issues
Flapper replacements are simple and can quickly fix a running toilet, potentially saving you money on your water bill. However, if you encounter issues, here are some troubleshooting tips:
- If the toilet continues to run, check if the chain is too tight or too loose.
- If the flapper doesn’t seal properly, ensure it’s the right size and type for your toilet.
- If the flush is weak, make sure the flapper is lifting high enough to allow a full flush.
Final Thoughts
Repairing your toilet doesn’t have to be a stressful chore! Whether you’re swapping out the fill valve, flapper, or trip lever, these simple steps can save you time and money. By following these tips, you’ll be ready to quickly diagnose and fix common toilet problems, helping your bathroom stay in top shape. A little DIY effort can go a long way in keeping your toilet running smoothly. If you need extra help or specific parts, check out PlumbingDeals.com for a great selection of replacement components to support your project!


