After chatting with many of our customers, I realized that while our blog post "DIY Project: Toilet Repair" is a helpful resource, it might feel a bit cluttered. To make it easier for everyone looking to fix their toilets, I’ve decided to break the information into three separate blog posts, each focusing on the key components of toilet repair. Each post will provide clear, step-by-step instructions for replacing individual parts, making it more accessible for DIY enthusiasts. I’ll be diving into each part: the fill valve, the flapper, and the trip lever.
How to Replace a Trip Lever
Replacing a trip lever, commonly known as a flush handle, is a straightforward DIY repair that requires just a few simple tools. A faulty trip lever can lead to several issues, including improper flushing, a loose or wobbly handle, or an incomplete tank fill. By tackling this issue, you can get your toilet flushing properly again.
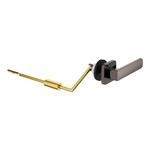
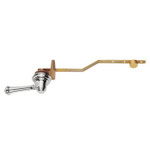
Trip levers are usually customized for each toilet model to fit the unique tank and bowl designs of specific manufacturers. However, a few universal styles can work with various models, including chain-operated, push-button, and lever-operated levers. When replacing a trip lever, it's essential to ensure the new lever is compatible with your toilet's design.
The trip lever is the handle you use to flush the toilet. Over time, the lever mechanism can wear out or become loose, requiring replacement. Here’s how to replace it:
1. Remove the lid of the toilet tank and disconnect the chain from the trip lever.
2. Unscrew the mounting nut on the inside of the tank that holds the trip lever in place. Note that the nut may be reverse-threaded, so turn it clockwise to loosen.
3. Pull out the old trip lever and slide in the new one.
4. Tighten the nut to secure the new lever in place.
5. Reconnect the chain to the trip lever, ensuring the correct tension for the flapper to lift properly when flushed.
Test the lever to make sure it operates smoothly, and you’re all set!
Repairing your toilet doesn’t have to be a hassle! Whether you're changing out the fill valve, flapper, or trip lever, these easy steps can save you both time and money. With these handy tips, you’ll be all set to quickly diagnose and fix common toilet issues, keeping your bathroom in tip-top shape. If you need a bit of extra help or specific parts, don’t forget to check out PlumbingDeals.com for a fantastic selection of replacement components to support your project!